Giani Marble Countertop Paint: My Tips and Tricks for this Fabulous Product!

As always, I’m continually working on updating my home through a little hard work, using what I have, and ensuring I keep on a budget. Although I LOVE total home makeovers and renovations, it is just not in my budget right now. Plus, I love keeping original pieces to a home and love the challenge of using what I have and making it more beautiful.
One area I have been working on has been my kitchen. I actually really like my kitchen! it is open and has white cabinets (which was a win for me). It just needed to get rid of the wallpaper and paint the walls,, which I completed this past fall. That was the major thing that needed to be done, and I have been slowly working on each area within the kitchen to bring it all together.
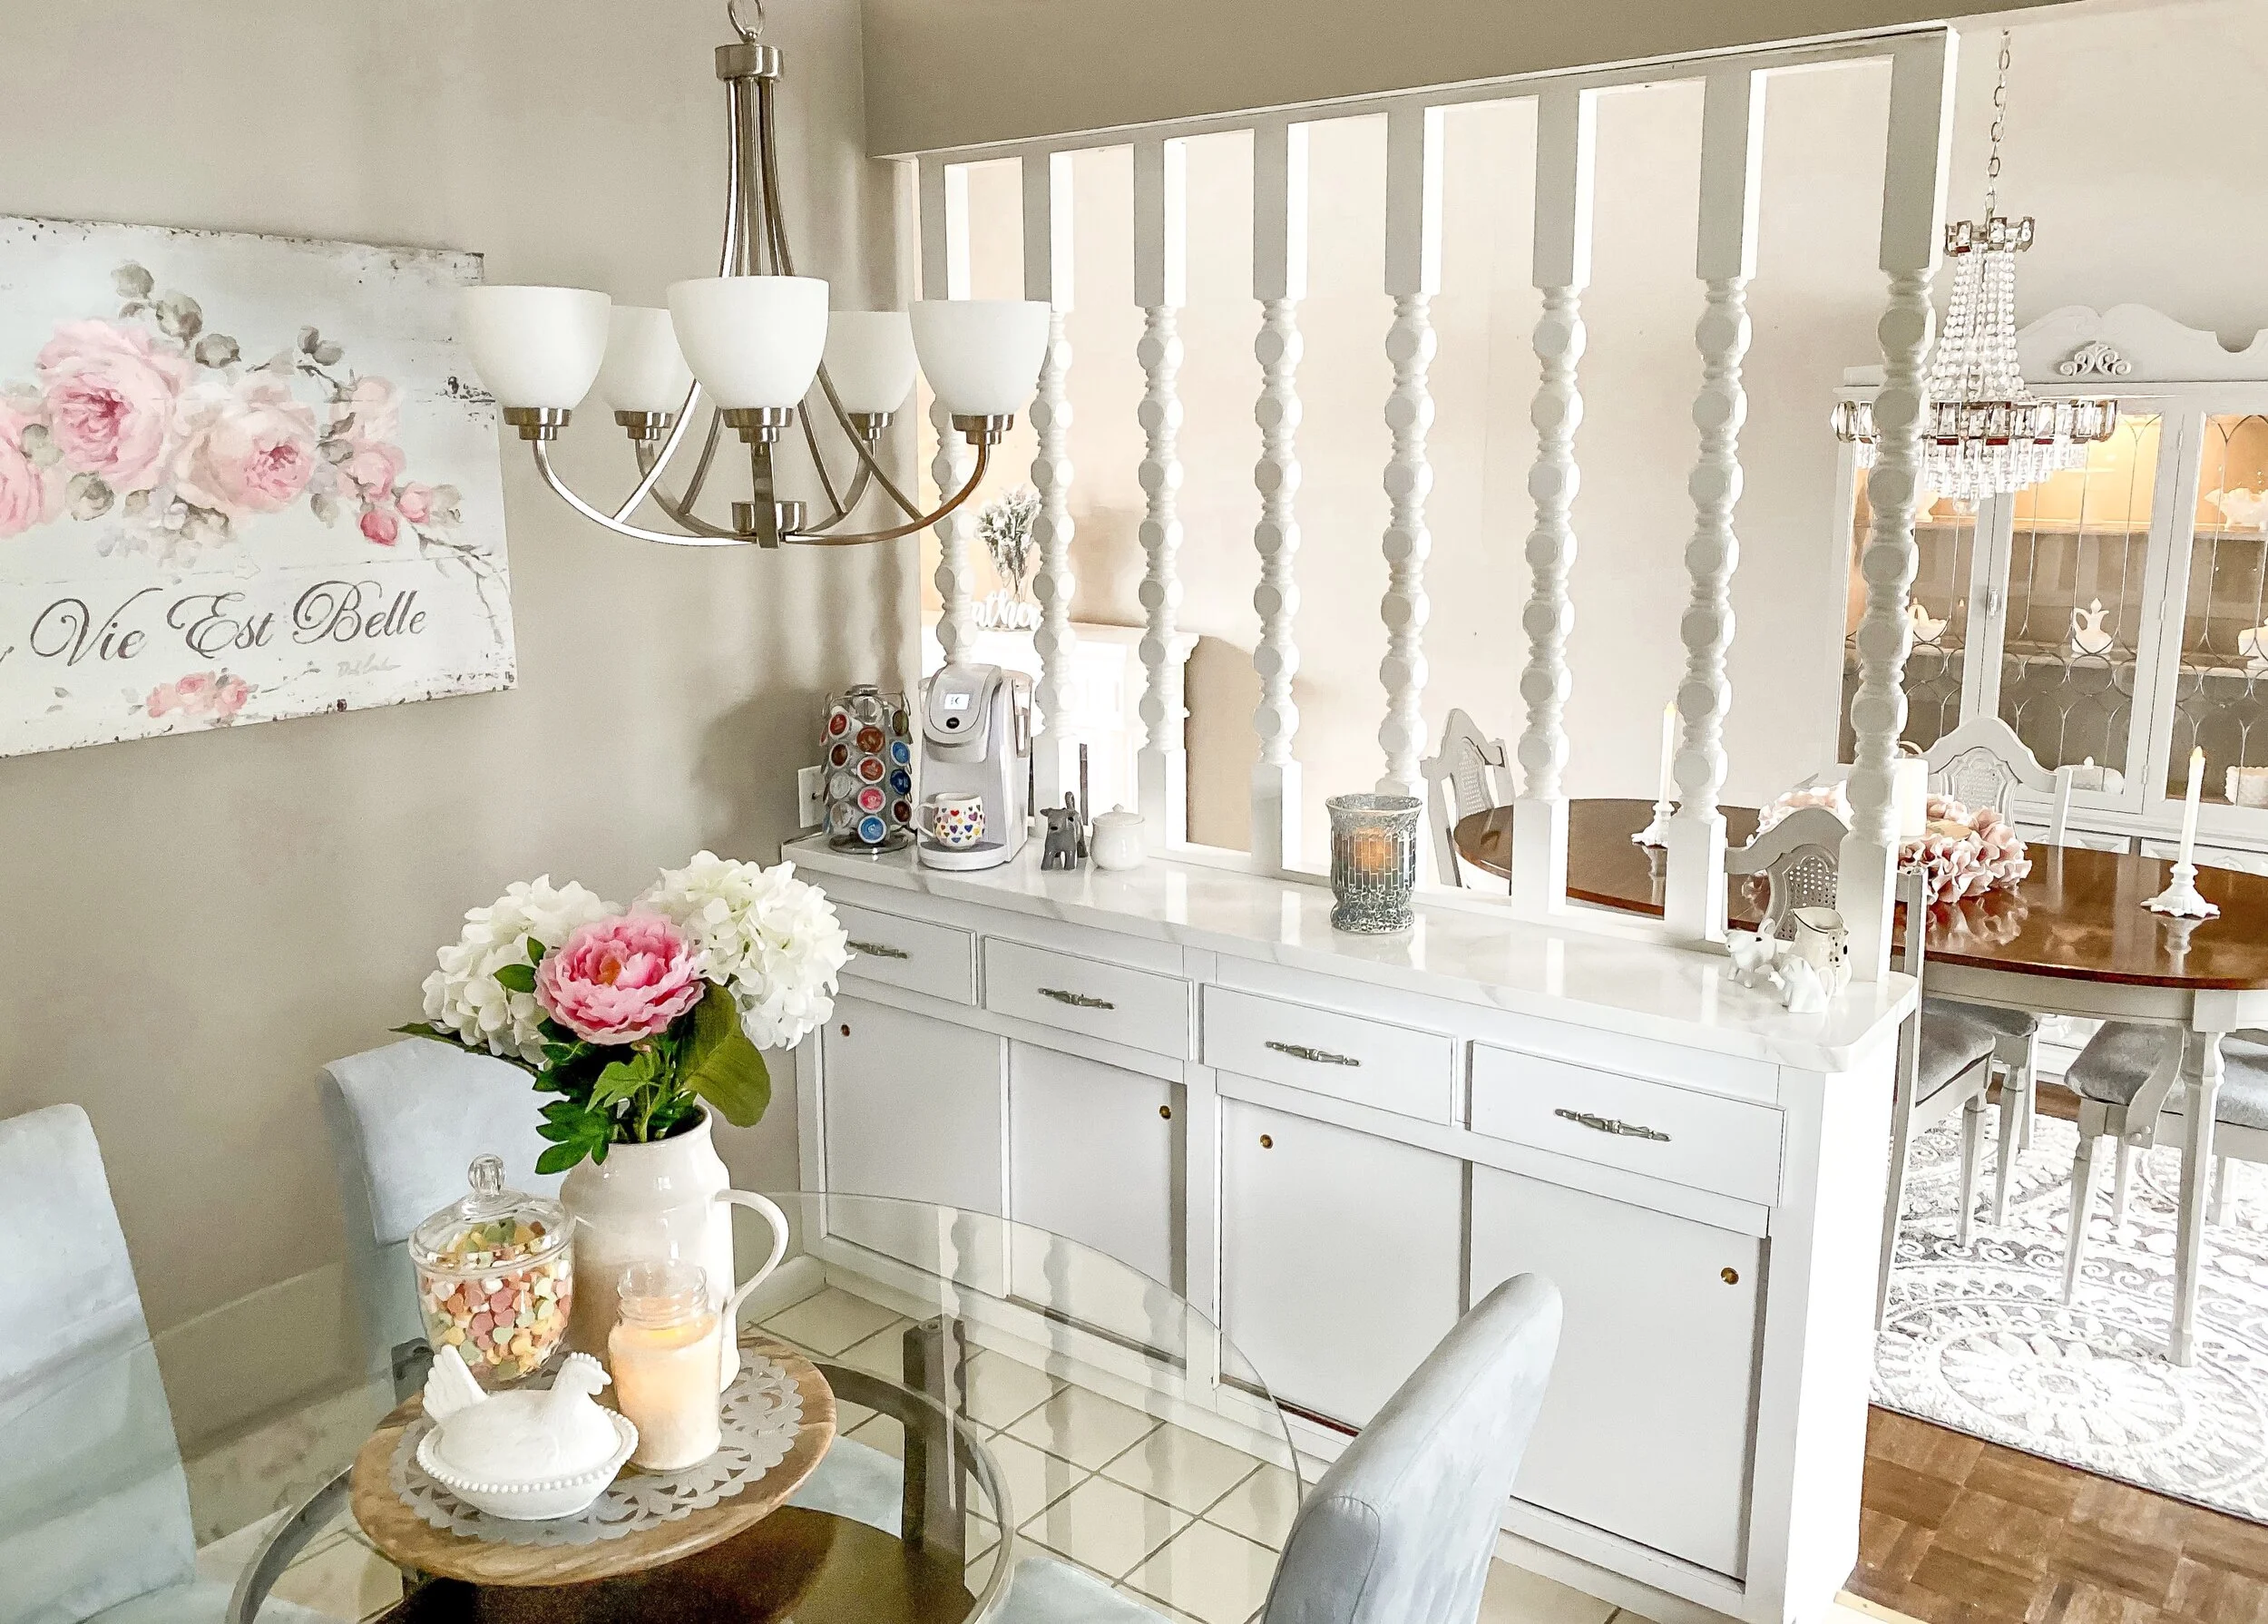
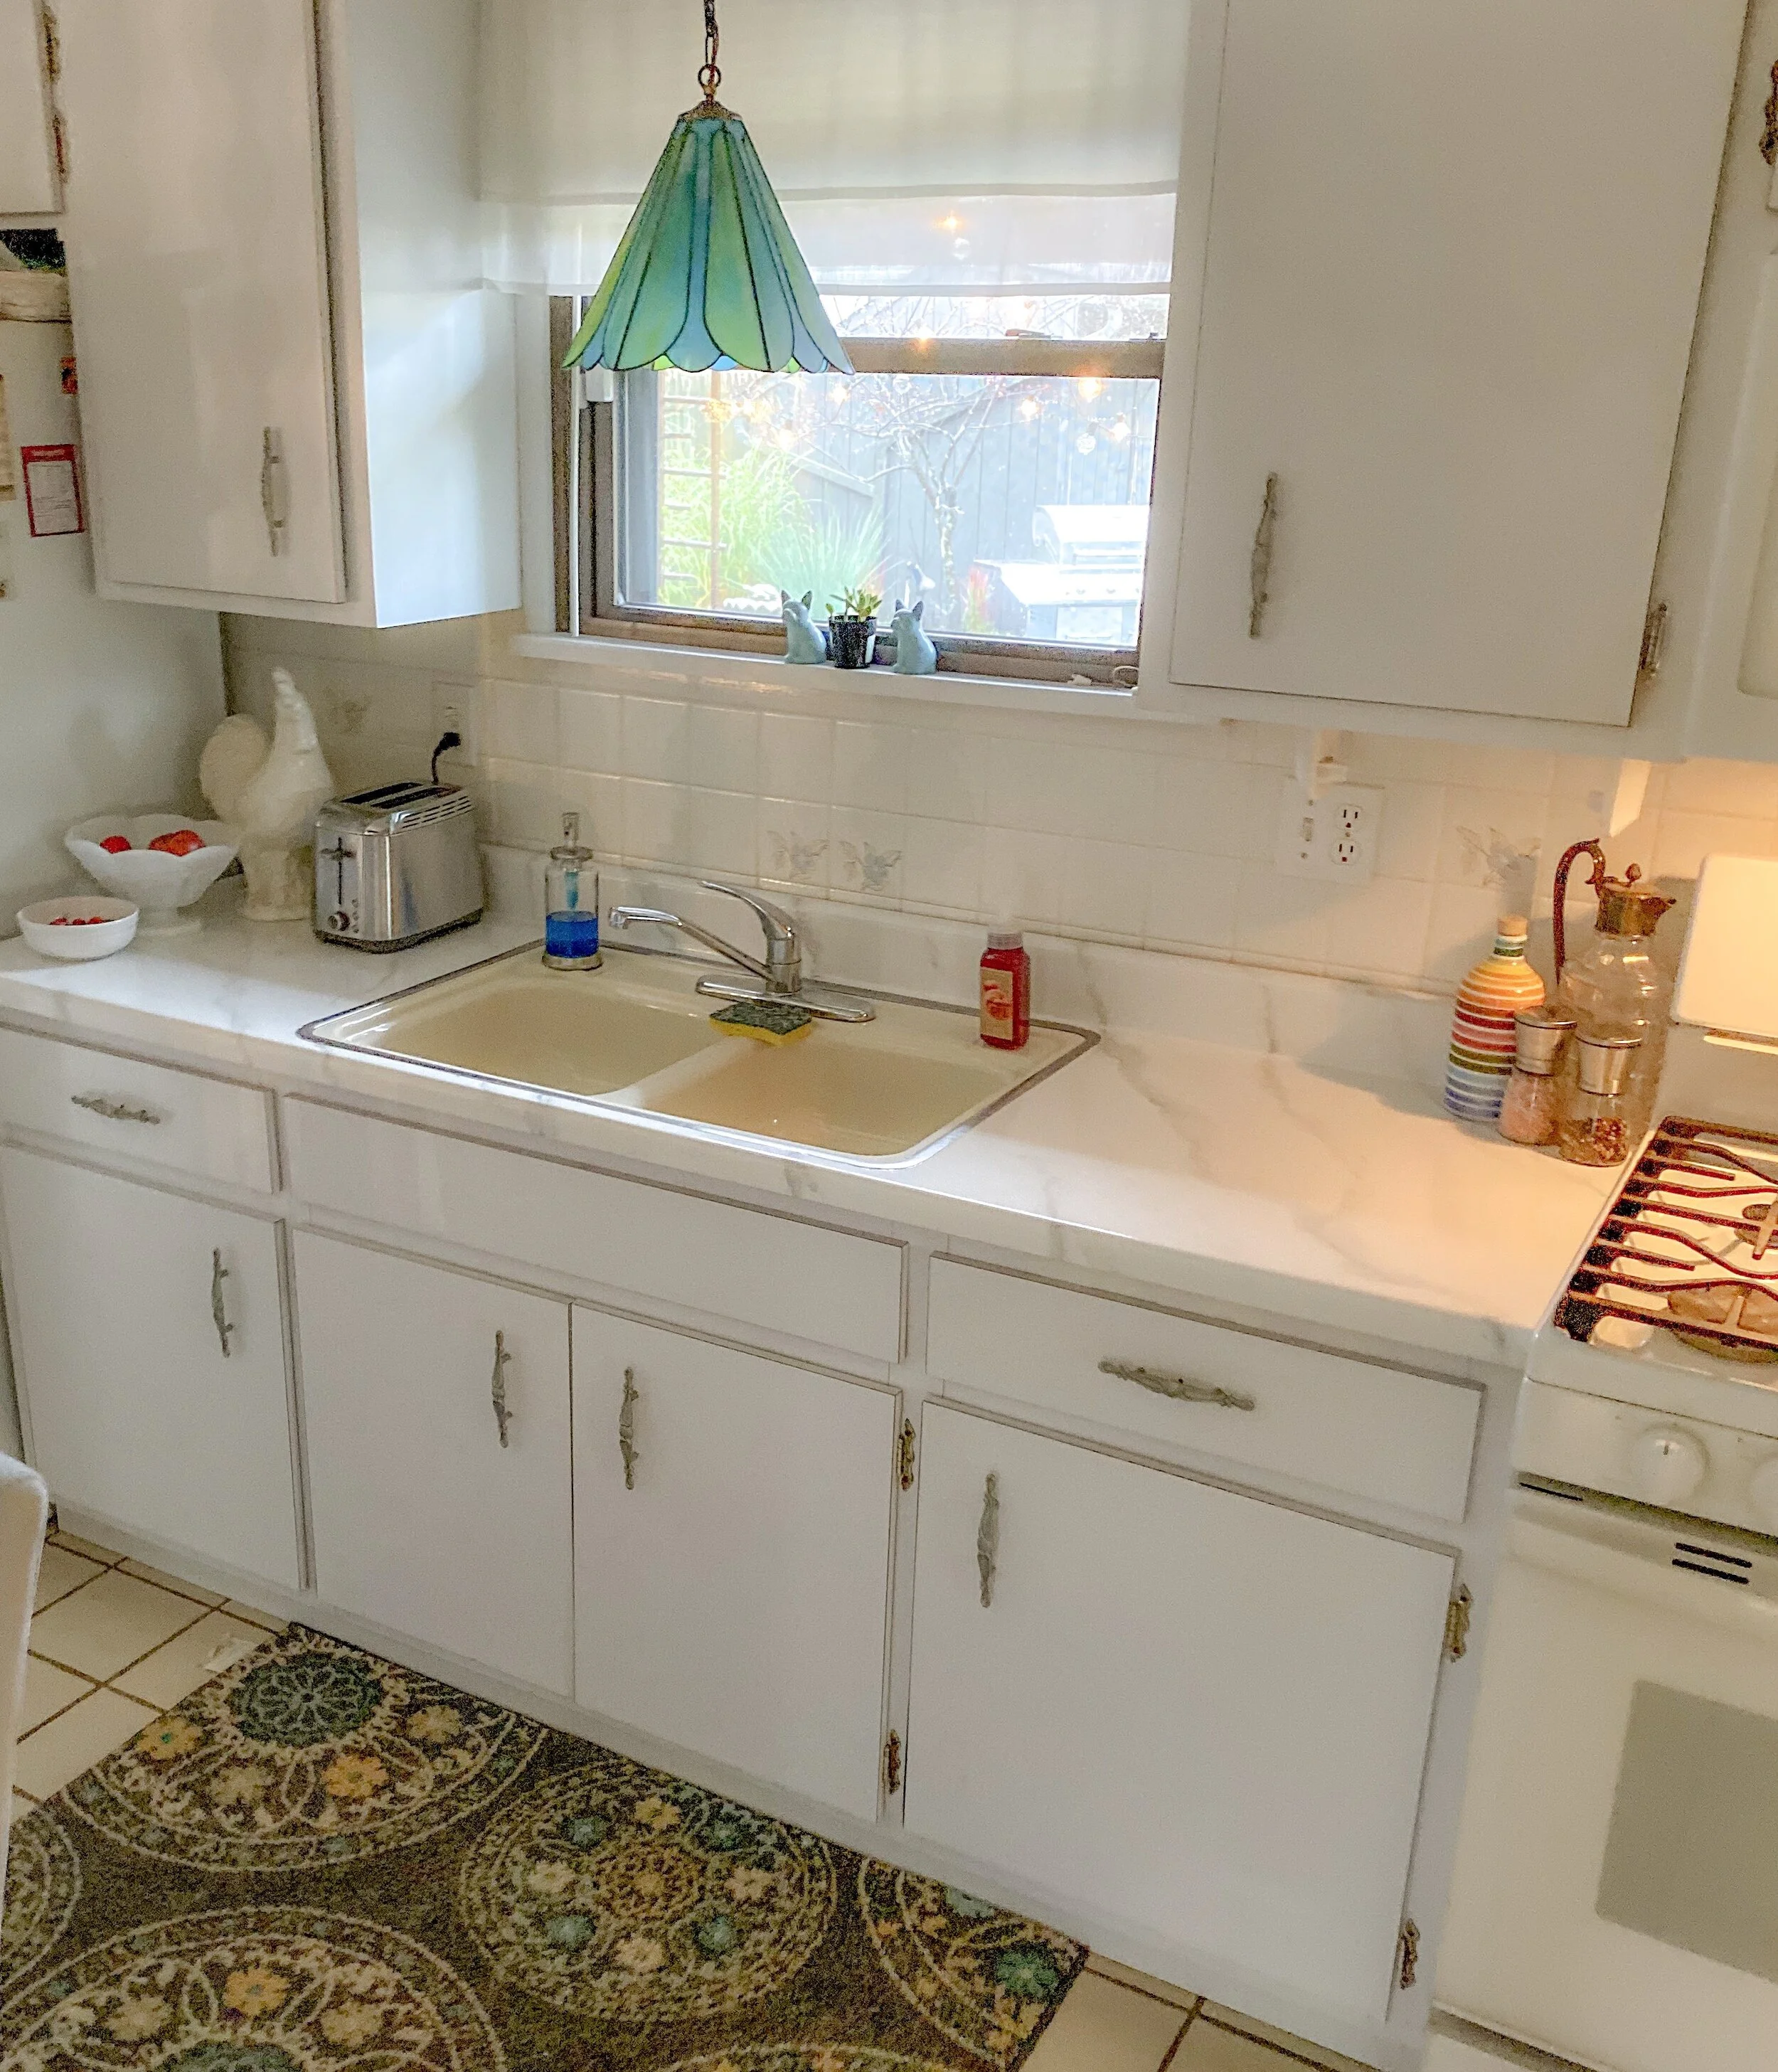
My countertops were a beige laminate with a yellow undertone that were definitely not what I was looking for. I considered investing in new countertops but ran into a few barriers, which included ruining the old fashioned poles on the coffee bar (I know some might hate it, but I actually like the look and think the white pops nicely against the gray!) and potentially ruining my cabinets below (which would be a major problem that could potentially lead to a total gut!).
Once I weighed these options, I decided to look into painting the countertops instead. For months, I researched on the process and how to do it. I really wanted marble looking countertops, but at that time, Giani did not have a marble countertop kit. They had their White Diamond Granite Look kits , which I liked, but I really wanted marble. Some bloggers had used this kit to create a marble countertop look, but their process looked too complicated.
Lo and behold, a few months later, Giani came out with a Marble Countertop Kit! Although I also considered using the granite kit, I knew I ultimately wanted the marble counter top look. I purchased it in the spring, with the intent of doing this over my spring break, but I ultimately did my dining room project first. It was not until my summer break in July that I decided to tackle this project.
I know when I had told everyone I was painting my countertops, they thought I was crazy. My dad even warned me to not tackle it. I figured it could not be worse than the yellow beige I already had. Plus, my thought was that if the marble did not turn out, I could try the White Diamond Granite kit or just paint over the marble with the white paint. In my opinion, pure white countertops were so much better than the beige!
When you tackle this product, my biggest piece of advice is to ensure you follow the directions to a tee. Absolutely no ifs, ands, or buts. I would also read the directions and watch the tutorial videos on the Giani website (especially if you do not buy the product directly from the vendor). This is a must and basically gave me the confidence to do it.
My blog post is not a tutorial, especially since the Giani tutorial is the best there is; however, here is what I learned from my experience.
As I mentioned before, watch the tutorial. This is key. This will help you understand the steps and is especially important as you create the marble veining. They teach you several techniques which you absolutely need to know in order to create realistic veins.
As they mention in the tutorial, use a photo of marble to guide you. Your product will definitely not look like the photo, but it will help provide you inspiration as you create the large and major veins to create a more natural look.
They give you a practice board to try on, but I don’t think I really needed it. The texture of the board is not the same at all as the countertops, so I don’t think it is a good test. I got more nervous with that board but found that the countertops were way smoother to work with to get the veins to your liking.
Don’t freak out! It will be fine when painting the veins. If you look at pieces of marble, some have tons of veins, others have little. Some are darker, others are light. You really can’t go wrong. My biggest piece of advice is to ensure you had some darker veins so they show up, blend with the water, and ensure you had very light veins in between to add depth.
Follow all directions, including dry time. I am not a patient person and waiting for dry time is so hard for me, especially when painting furniture. Since these were countertops, a more permanent piece to my home than a piece of painted furniture that can easily be removed or disposed, I was extra careful and forced myself to be patient to follow the directions and the entire wait time. That was key to me in these coming out well.
Once you complete the veining, you need to put the protective acrylic top coat on the countertops. You do two coats, and this is key to its durability. The top coat dries fairly quickly; however, the total cure time (when the acrylic completely hardens and is ready to use) is 14 days. This wait time was the toughest part of the entire process. My kitchen felt messy, prepping food was a challenge on the kitchen table, and my Keurig was down in the mudroom, making coffee prep more challenging with a few extra steps. The Giani instructions say that after 24 hours, the countertops can have light use, but I’m not sure what “light use” is. My advice is just to not use or put anything on your countertops for the entire 14 days. I noticed they just kind of had a stickiness to them any time I put something on the countertops. After about 10 days I was getting impatient and wanted to start putting things back, but after chatting with a Giani rep online, I decided to just wait the 14 days. And I’m glad I did. At that time, I could see a huge difference from even day 10. The countertops no longer had this sticky feeling to them, and any items I set on the countertops no longer had that initial sticky feeling. The countertops were smooth and easy to wipe down. It was definitely a difference. During the cure time, I felt like I needed to be extra careful, as they just did not seem that durable to me yet. The 14 days really was the magical mark, as I even felt I could actually use the countertops! I could definitely see a difference in their feel from during the curing phase to post cure.

So there is my adventure in countertops! I am loving them so far and love the look. I am now anxious to start on the backspace (info coming soon) and my sink! Stay tuned to the blog and Instagram for what I do. :)
I linked up the Marble Countertop Kit and White Diamond Kit from Amazon below. I actually initially purchased mine directly from the vendor but noticed they are sold out of the Marble kit on their website but not on Amazon. Plus, the prices are the same as the Giani site, and you can get Prime shipping. Check the two kits out below. They have other ones, including butcher block and different colored granite, but I wanted to link up the two I was considering.

So what do you think? Does this make you want to paint your countertops? I’d love to hear your thoughts below!