Dining Room Set Makeover Using Flat Latex Paint and High Quality Primer
Like many other bloggers and home professionals, I absolutely LOVE updating my home. One of my favorite ways to do this is by upcycling old furniture. My go to and easy way to immediately update a piece of furniture is to paint it!
The more furniture painting projects I do, the more I learn and the better I get. I learn something new from each project I do that I can always apply to future projects, and each project I do turns out better and better!
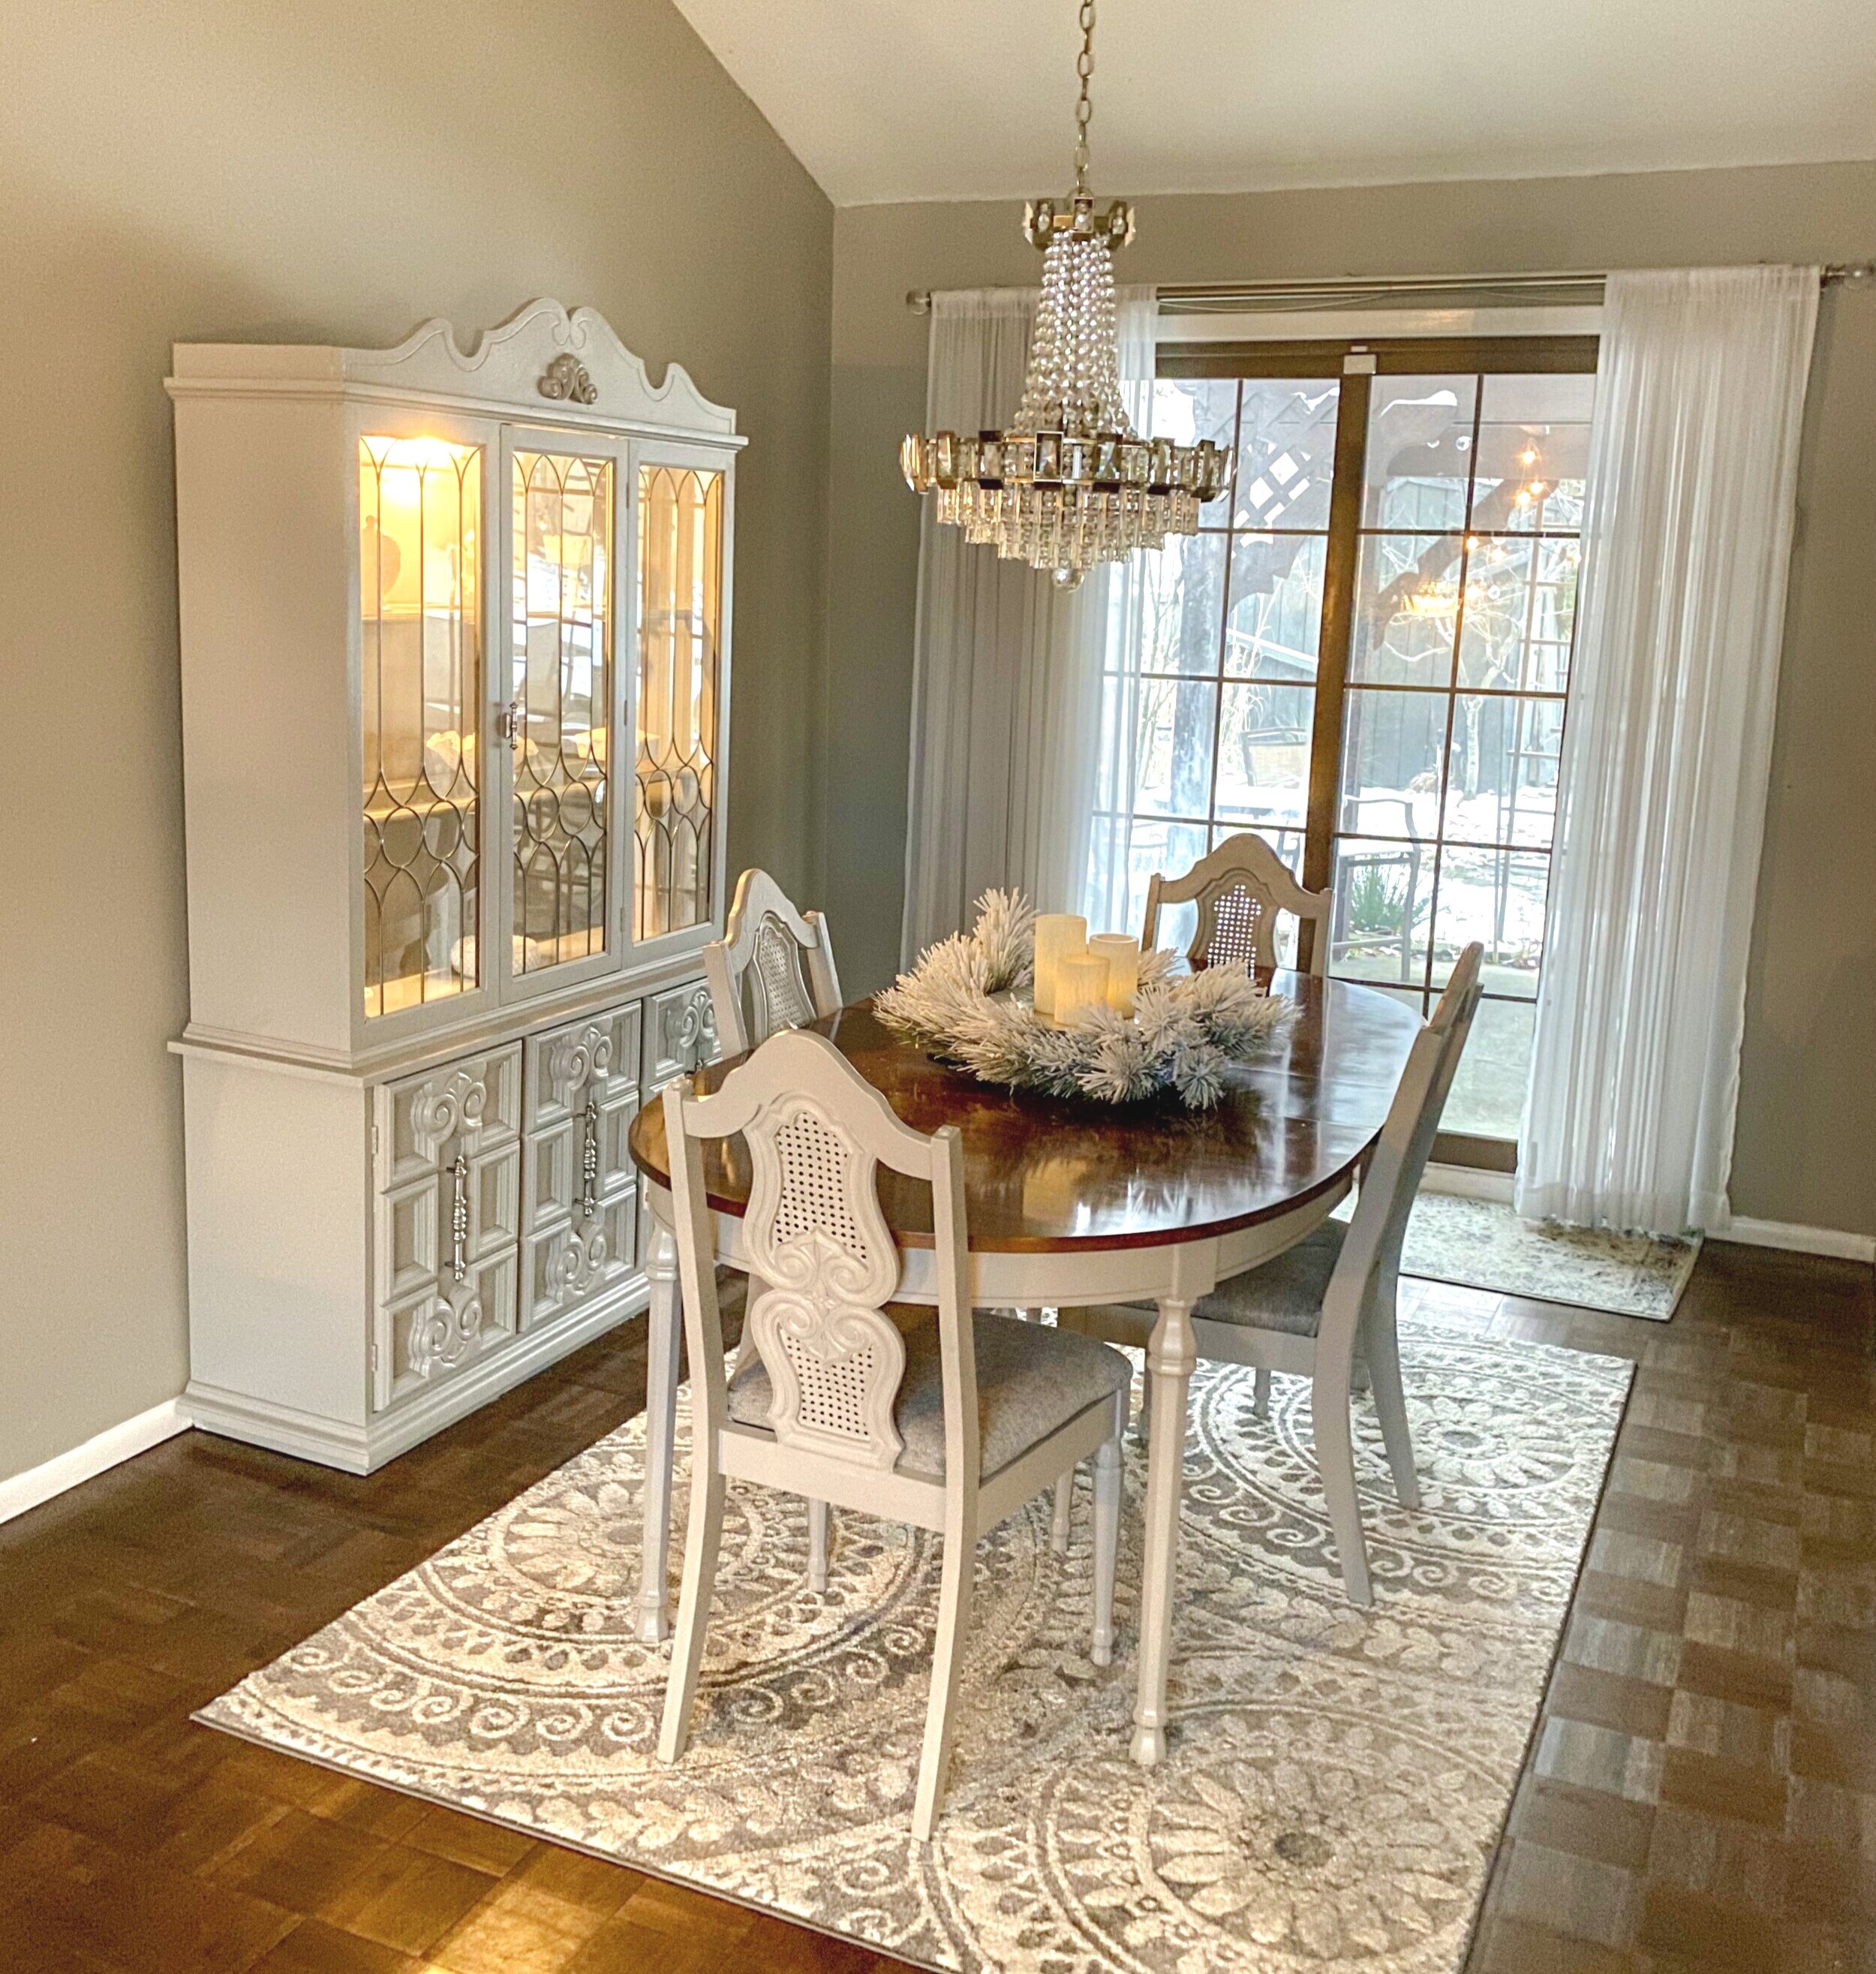
This past spring, I completed a major furniture makeover of my dining room set, which included the hutch, table, and chairs. I actually inherited this set from the previous owner. Although some may look at it and think it is dated, I know dining room sets can be expensive! I had to look past what I saw and envision what it could be. I knew I wanted the pieces to be clean and not distressed, yet have the look of a flat, matte chalk paint.
Although I have used chalk paint and like it, I do not always want that look or a distressed look for each piece of furniture I paint. Although I continue to use it and like it (and want to experiment with milk paint), I still also like a clean piece of painted furniture, which I can easily achieve through Latex Paint.
At times, I want more a semi gloss or glossy finish to my furniture, especially if it is going to be in a highly used area, as this allows it to be easily cleaned and wiped down. Other times, I absolutely love the flat, matte look of non-distressed chalk paint but want something more durable (I do believe latex is more durable). I wanted this same matte look for my dining room hutch and table with durability.
As a result, I decided to go with a flat latex paint. Since both pieces were veneer and hard to sand, I picked up Zinsser primer as well.

This was the dining room in the original sale listing for my house! I think I have brought it a loooooong way! But it’s the. same dining room set!

This photo was taken during the evening, so the quality is not the best. This was taken after I had painted all the walls. I knew the dark, orange tone wood had to go in this room.
I really struggled in identifying what color to paint the hutch and table. I knew the wood would not go, but I didn’t want to do white. After seeing these two images on Pinterest (yes, I do seek inspiration), I felt safe to go with the gray tones.
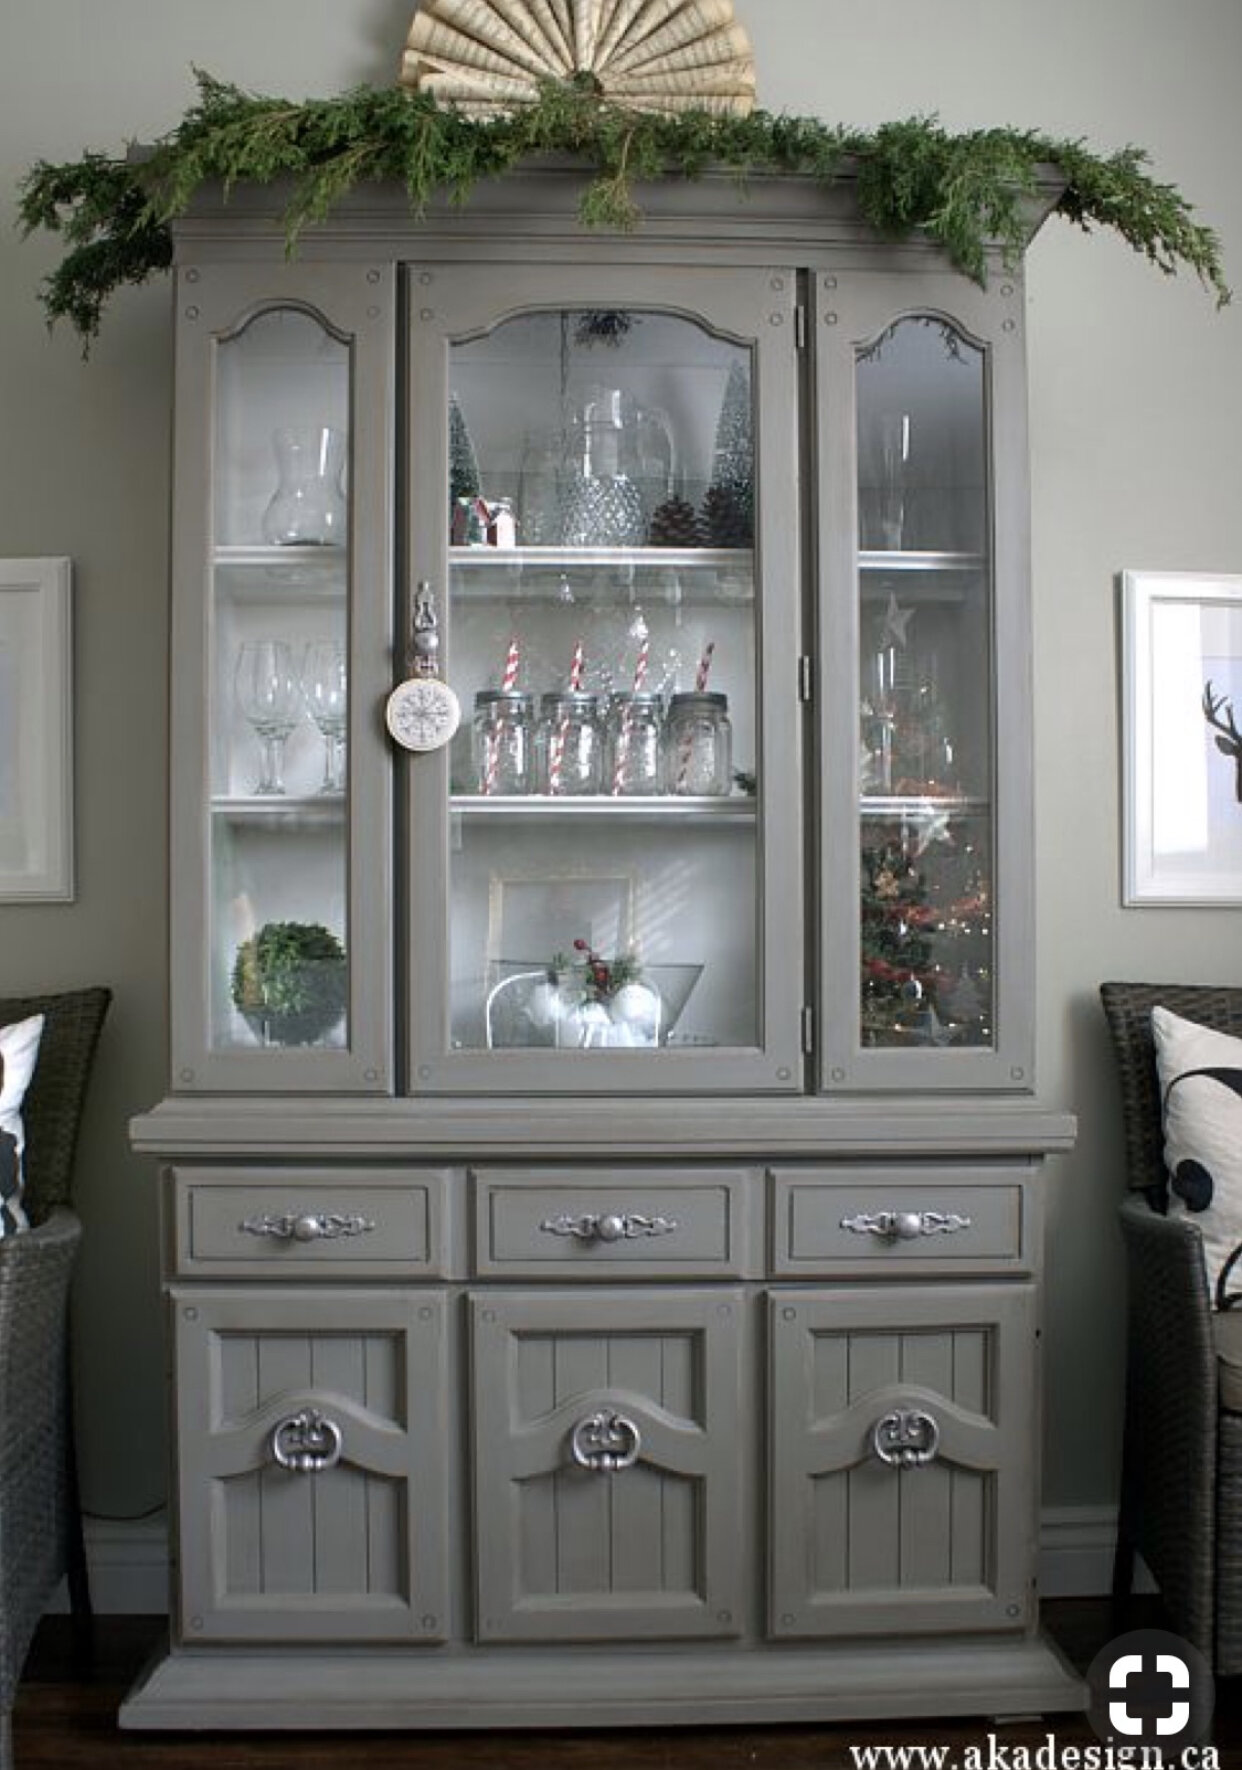
Pinterest Image Inspiration 1

Pinterest inspiration 2
HUTCH
The first item I started with that I knew that absolutely had to be done and was driving me nuts was the hutch. I had recently painted the walls in my dining room, living room, and kitchen, and even added a new dining room carpet, so I knew the orange tone wood had to go, as you can see in the above photos. I thought for awhile about what color I wanted to go with and ultimately decided on a gray color that was slightly lighter than my walls. For reference, I have Behr Premium Plus Ultra in Perfect Taupe in a flat finish on the walls. I finally decided to go with Behr Premium Plus Ultra in Fashion Gray in a flat finish for the dining room set. I also picked up Zinsser Primer, which is my go to Primer for any paining project. I used it on my walls after I removed wallpaper and initially learned about it after I redid the drywall in my bathroom upstairs (I will be sharing that project in a future post).
Since all items were veneer, you cannot do all your painting the ideal way by sanding, etc. I have learned through the years, that you actually can paint veneer, but it is all about the steps you take. Yes, chalk paint is always a good solution since you do not have to sand or prime; however, I have found that dark woods can still peek through the color, so it always took multiple coats of paint. I use one coat of zinsser primer on all my veneer furniture projects (learning this was a game changer), which adhered very nicely to the veneer, dried quickly, and roughed up the surface enough for a coat of paint.
After the primer completely dries (this tends to dry much more quickly than the paint), I start painting the furniture and do coats of paint with ample dry time in between. This dry time is key. The hutch dried fairly quickly with little drips, so I was super please with how this came out.
My hutch from start to finish, including prep of taping, priming, and painting, took a whole day. I would say about 12 hours. The hutch was not too bad since it had large surface area, making it easy to paint. The harder area was the interior and intricate details on the hutch.

Getting this 80s/90s dark hutch ready for a makeover!

Finished product on the hutch!

I kept the original hardware and spray painted it silver! I thought about it changing it, but after painting it, I still think it’s perfect! All the changes make the hardware pop and look more expensive.
TABLE
Now the hutch was finished, something needed to be done about the table. It just didn’t match, yet I didn’t want to paint the entire thing, since I still used the table and needed the surface to be durable. What I decided to do was leave the top dark wood veneer alone (and this was darker and less orange than the rest of the table) for durability but paint the bottom the same Fashion Gray color.
I followed the same steps above, and table was very quick. Only a couple hours from start to finish!

Table in Progress!
CHAIRS
Last were the chairs. I saved these for last as I had no idea what to do with them. The previous owner had created a fabric padded backing on his own, and I only discovered this was the case was the back of one fell off! I saw what they looked like underneath. I pondered creating my own backing but after realizing his backing would not be something I could recreate and knowing that fabric was not ideal for practical purposes (cat hair), I decided to just completely deconstruct the chairs back to their original form and just do a fabric padding the bottom part of the chair.
The deconstruction took an afternoon. I also had to fill nail holes from the studs and sand. Then I primed and painted. The biggest lesson I have learned from painting furniture is to be patient, take my time, and let everything dry completely in between coats. The hutch and table had no problem drying quickly between coats, but the chairs were having difficulty. It was raining the night I painted the chairs, and I think the intricacy of the woodwork caused some pooling and dripping of paint. I probably rushed through this part o f the project and should have stretched the painting of the chairs out a day or two, but I was going back to work the next day and just wanted to be done. Although the chairs turned out great, I see imperfections I know that could have been avoided by waiting for each coat to dry fully.
After the chairs were done, I started looking for fabric to use. I headed up to Joann Fabric, and lo and behold, they were having a great sale on upholstery fabric. I found a dark gray upholstery fabric that was resistant to stains and easy to clean for pets. I love this fabric so much, and it is way better than the fabric that was previously on the chairs.

Original chairs inherited from Walter

Chairs deconstructed to their original state

Finished chairs prior to the upholstery
So that is my dining room make-over in a nutshell! That is also how I used primer and latex paint when painting furniture and how I get the chalk look with a more durable finish. I hope this gives you confidence to start your own furniture painting project or gives you some ideas and inspiration to see old furniture that you inherited differently. What do you think of the project? What furniture upcycling projects do you want to tackle?
I’ve linked up my products. The Zinsser Prime Coat is a MUST. As I said, this was highly recommended from commercial dry wallers who work in all the major construction projects in downtown Cleveland (and who did my bathroom wall!).
Shop my dining room rug below. Mine is the 7 X 9 and is in the Gray color.
